Tutorial despre cum sa desenezi un cub 3D cu Open GL, sa-l rotesti si sa pui 6 imagini, cate una pe fiecare fata a sa.
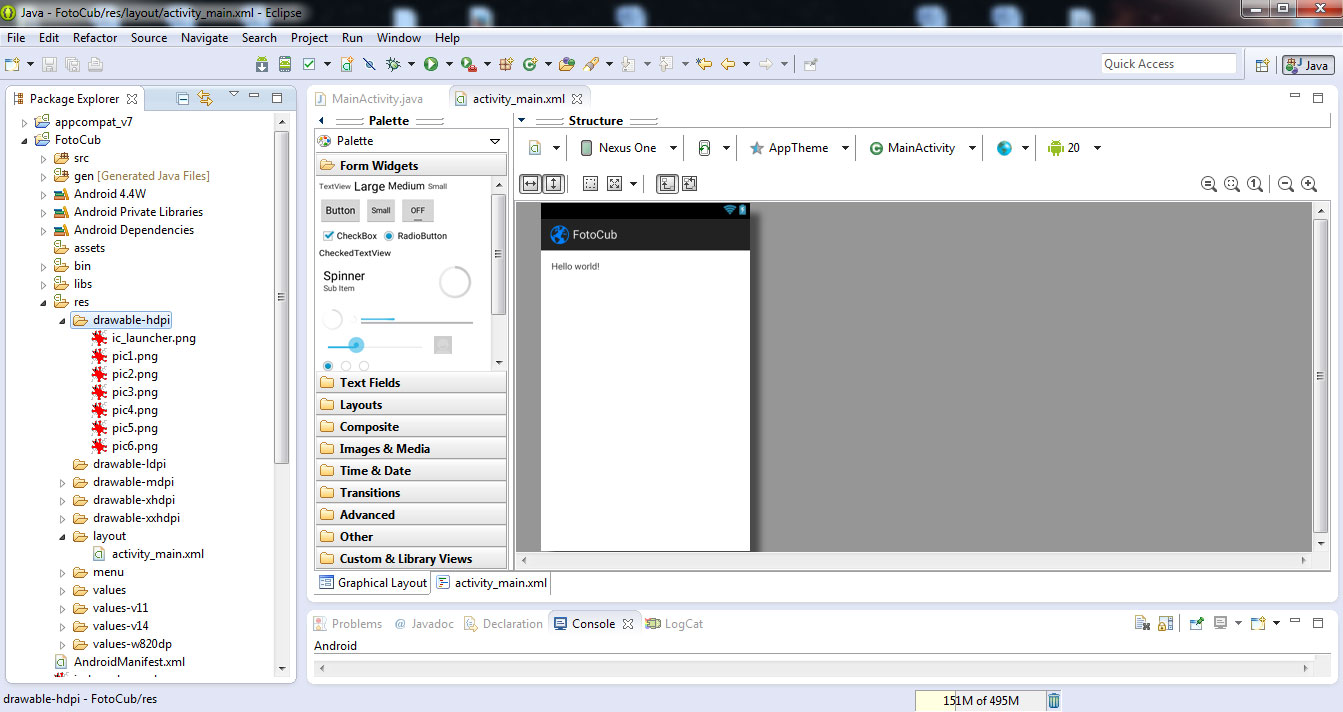
Deschidem Eclipse si cream un proiect nou (vezi aici cum) pe care il denumim FotoCub.
Punem 6 imagini (pe care vrem sa le punem pe fetele cubului) din pc (cu copy-paste) in res -> drawable-hdpi.
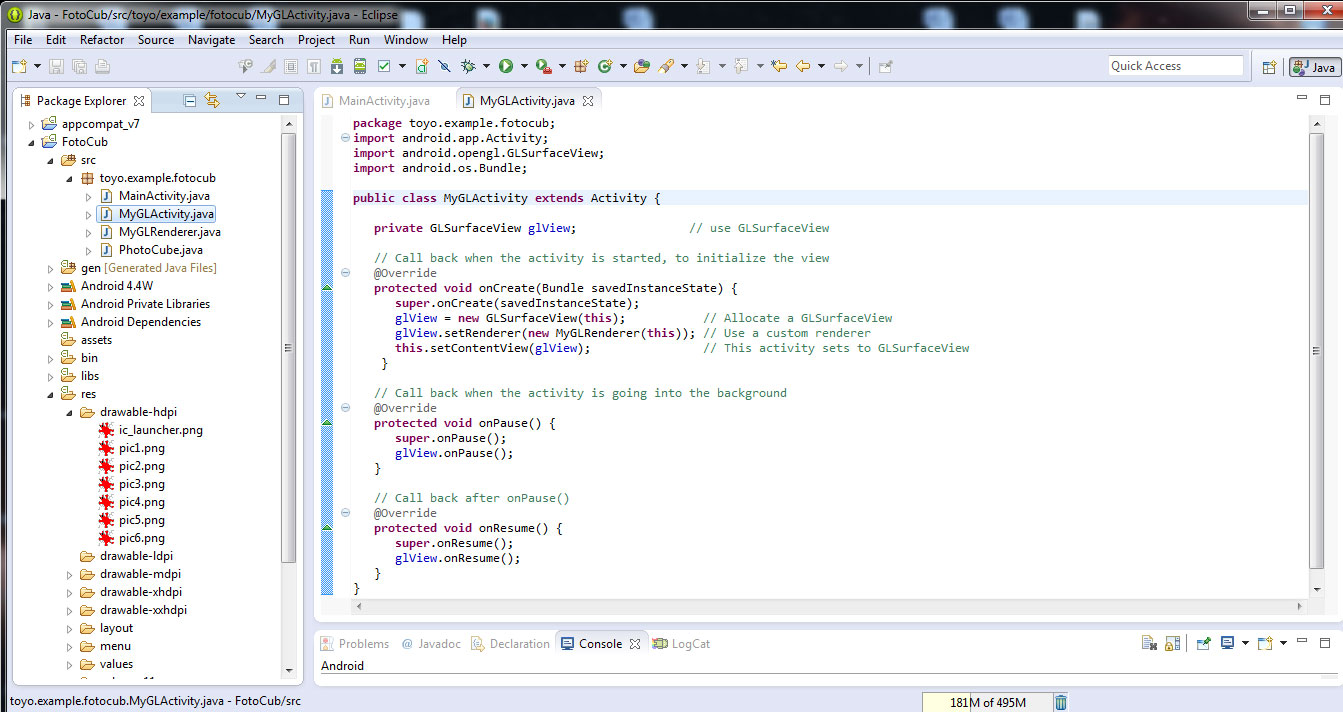
Dam click dreapta pe folderul FotoCub al proiectului nostru si selectam New -> Class. Se deschide o fereastra in care se completeaza numele noii clase: MyGLActivity. In acest fisier scriem codul:
package toyo.example.fotocub;
import android.app.Activity;
import android.opengl.GLSurfaceView;
import android.os.Bundle;

public class MyGLActivity extends Activity {

   private GLSurfaceView glView;                   // use GLSurfaceView

   // Call back when the activity is started, to initialize the view
   @Override
   protected void onCreate(Bundle savedInstanceState) {
      super.onCreate(savedInstanceState);
      glView = new GLSurfaceView(this);           // Allocate a GLSurfaceView
      glView.setRenderer(new MyGLRenderer(this)); // Use a custom renderer
      this.setContentView(glView);                // This activity sets to GLSurfaceView
    }

   // Call back when the activity is going into the background
   @Override
   protected void onPause() {
      super.onPause();
      glView.onPause();
   }

   // Call back after onPause()
   @Override
   protected void onResume() {
      super.onResume();
      glView.onResume();
   }
}
Cream o noua clasa, ca si mai sus, pe care o denumim MyGLRenderer si in care scriem urmatorul cod:
package toyo.example.fotocub;

import javax.microedition.khronos.egl.EGLConfig;
import javax.microedition.khronos.opengles.GL10;
import android.content.Context;
import android.opengl.GLSurfaceView;
import android.opengl.GLU;

public class MyGLRenderer implements GLSurfaceView.Renderer {
   private PhotoCube cube;     // (NEW)
   private static float angleCube = 0;     // rotational angle in degree for cube
   private static float speedCube = 0.5f; // rotational speed for cube

   // Constructor
   public MyGLRenderer(Context context) {
      cube = new PhotoCube(context);    // (NEW)
   }

   // Call back when the surface is first created or re-created.
   @Override
   public void onSurfaceCreated(GL10 gl, EGLConfig config) {
      gl.glClearColor(0.0f, 0.0f, 0.0f, 1.0f);  // Set color's clear-value to black
      gl.glClearDepthf(1.0f);            // Set depth's clear-value to farthest
      gl.glEnable(GL10.GL_DEPTH_TEST);   // Enables depth-buffer for hidden surface removal
      gl.glDepthFunc(GL10.GL_LEQUAL);    // The type of depth testing to do
      gl.glHint(GL10.GL_PERSPECTIVE_CORRECTION_HINT, GL10.GL_NICEST);  // nice perspective view
      gl.glShadeModel(GL10.GL_SMOOTH);   // Enable smooth shading of color
      gl.glDisable(GL10.GL_DITHER);      // Disable dithering for better performance

      // Setup Texture, each time the surface is created (NEW)
      cube.loadTexture(gl);             // Load images into textures (NEW)
      gl.glEnable(GL10.GL_TEXTURE_2D);  // Enable texture (NEW)
   }

   // Call back after onSurfaceCreated() or whenever the window's size changes
   @Override
   public void onSurfaceChanged(GL10 gl, int width, int height) {
      if (height == 0) height = 1;   // To prevent divide by zero
      float aspect = (float)width / height;

      // Set the viewport (display area) to cover the entire window
      gl.glViewport(0, 0, width, height);

      // Setup perspective projection, with aspect ratio matches viewport
      gl.glMatrixMode(GL10.GL_PROJECTION); // Select projection matrix
      gl.glLoadIdentity();                 // Reset projection matrix
      // Use perspective projection
      GLU.gluPerspective(gl, 45, aspect, 0.1f, 100.f);

      gl.glMatrixMode(GL10.GL_MODELVIEW);  // Select model-view matrix
      gl.glLoadIdentity();                 // Reset

      // You OpenGL|ES display re-sizing code here
      // ......
   }

   // Call back to draw the current frame.
   @Override
   public void onDrawFrame(GL10 gl) {
          // Clear color and depth buffers
          gl.glClear(GL10.GL_COLOR_BUFFER_BIT | GL10.GL_DEPTH_BUFFER_BIT);

          // ----- Render the Cube -----
          gl.glLoadIdentity();                  // Reset the model-view matrix
          gl.glTranslatef(0.0f, 0.0f, -6.0f);   // Translate into the screen
          gl.glRotatef(angleCube, 0.15f, 1.0f, 0.3f); // Rotate
          cube.draw(gl);

          // Update the rotational angle after each refresh.
          angleCube += speedCube;
       }
}
Cream o noua clasa, ca si mai sus, pe care o denumim PhotoCube si in care scriem urmatorul cod:
package toyo.example.fotocub;

import java.nio.ByteBuffer;
import java.nio.ByteOrder;
import java.nio.FloatBuffer;
import javax.microedition.khronos.opengles.GL10;
import android.content.Context;
import android.graphics.Bitmap;
import android.graphics.BitmapFactory;
import android.opengl.GLUtils;
/*
 * A photo cube with 6 pictures (textures) on its 6 faces.
 */
public class PhotoCube {
   private FloatBuffer vertexBuffer;  // Vertex Buffer
   private FloatBuffer texBuffer;     // Texture Coords Buffer

   private int numFaces = 6;
   private int[] imageFileIDs = {  // Image file IDs
      R.drawable.pic1,
      R.drawable.pic2,
      R.drawable.pic3,
      R.drawable.pic4,
      R.drawable.pic5,
      R.drawable.pic6
   };
   private int[] textureIDs = new int[numFaces];
   private Bitmap[] bitmap = new Bitmap[numFaces];
   private float cubeHalfSize = 1.2f;

   // Constructor - Set up the vertex buffer
   public PhotoCube(Context context) {
      // Allocate vertex buffer. An float has 4 bytes
      ByteBuffer vbb = ByteBuffer.allocateDirect(12 * 4 * numFaces);
      vbb.order(ByteOrder.nativeOrder());
      vertexBuffer = vbb.asFloatBuffer();

      // Read images. Find the aspect ratio and adjust the vertices accordingly.
      for (int face = 0; face < numFaces; face++) {
         bitmap[face] = BitmapFactory.decodeStream(
               context.getResources().openRawResource(imageFileIDs[face]));
         int imgWidth = bitmap[face].getWidth();
         int imgHeight = bitmap[face].getHeight();
         float faceWidth = 2.0f;
         float faceHeight = 2.0f;
         // Adjust for aspect ratio
         if (imgWidth > imgHeight) {
            faceHeight = faceHeight * imgHeight / imgWidth;
         } else {
            faceWidth = faceWidth * imgWidth / imgHeight;
         }
         float faceLeft = -faceWidth / 2;
         float faceRight = -faceLeft;
         float faceTop = faceHeight / 2;
         float faceBottom = -faceTop;

         // Define the vertices for this face
         float[] vertices = {
            faceLeft,  faceBottom, 0.0f,  // 0. left-bottom-front
            faceRight, faceBottom, 0.0f,  // 1. right-bottom-front
            faceLeft,  faceTop,    0.0f,  // 2. left-top-front
            faceRight, faceTop,    0.0f,  // 3. right-top-front
         };
         vertexBuffer.put(vertices);  // Populate
      }
      vertexBuffer.position(0);    // Rewind

      // Allocate texture buffer. An float has 4 bytes. Repeat for 6 faces.
      float[] texCoords = {
         0.0f, 1.0f,  // A. left-bottom
         1.0f, 1.0f,  // B. right-bottom
         0.0f, 0.0f,  // C. left-top
         1.0f, 0.0f   // D. right-top
      };
      ByteBuffer tbb = ByteBuffer.allocateDirect(texCoords.length * 4 * numFaces);
      tbb.order(ByteOrder.nativeOrder());
      texBuffer = tbb.asFloatBuffer();
      for (int face = 0; face < numFaces; face++) {
         texBuffer.put(texCoords);
      }
      texBuffer.position(0);   // Rewind
   }

   // Render the shape
   public void draw(GL10 gl) {
      gl.glFrontFace(GL10.GL_CCW);

      gl.glEnableClientState(GL10.GL_VERTEX_ARRAY);
      gl.glEnableClientState(GL10.GL_TEXTURE_COORD_ARRAY);
      gl.glVertexPointer(3, GL10.GL_FLOAT, 0, vertexBuffer);
      gl.glTexCoordPointer(2, GL10.GL_FLOAT, 0, texBuffer);

      // front
      gl.glPushMatrix();
      gl.glTranslatef(0f, 0f, cubeHalfSize);
      gl.glBindTexture(GL10.GL_TEXTURE_2D, textureIDs[0]);
      gl.glDrawArrays(GL10.GL_TRIANGLE_STRIP, 0, 4);
      gl.glPopMatrix();

      // left
      gl.glPushMatrix();
      gl.glRotatef(270.0f, 0f, 1f, 0f);
      gl.glTranslatef(0f, 0f, cubeHalfSize);
      gl.glBindTexture(GL10.GL_TEXTURE_2D, textureIDs[1]);
      gl.glDrawArrays(GL10.GL_TRIANGLE_STRIP, 4, 4);
      gl.glPopMatrix();

      // back
      gl.glPushMatrix();
      gl.glRotatef(180.0f, 0f, 1f, 0f);
      gl.glTranslatef(0f, 0f, cubeHalfSize);
      gl.glBindTexture(GL10.GL_TEXTURE_2D, textureIDs[2]);
      gl.glDrawArrays(GL10.GL_TRIANGLE_STRIP, 8, 4);
      gl.glPopMatrix();

      // right
      gl.glPushMatrix();
      gl.glRotatef(90.0f, 0f, 1f, 0f);
      gl.glTranslatef(0f, 0f, cubeHalfSize);
      gl.glBindTexture(GL10.GL_TEXTURE_2D, textureIDs[3]);
      gl.glDrawArrays(GL10.GL_TRIANGLE_STRIP, 12, 4);
      gl.glPopMatrix();

      // top
      gl.glPushMatrix();
      gl.glRotatef(270.0f, 1f, 0f, 0f);
      gl.glTranslatef(0f, 0f, cubeHalfSize);
      gl.glBindTexture(GL10.GL_TEXTURE_2D, textureIDs[4]);
      gl.glDrawArrays(GL10.GL_TRIANGLE_STRIP, 16, 4);
      gl.glPopMatrix();

      // bottom
      gl.glPushMatrix();
      gl.glRotatef(90.0f, 1f, 0f, 0f);
      gl.glTranslatef(0f, 0f, cubeHalfSize);
      gl.glBindTexture(GL10.GL_TEXTURE_2D, textureIDs[5]);
      gl.glDrawArrays(GL10.GL_TRIANGLE_STRIP, 20, 4);
      gl.glPopMatrix();

      gl.glDisableClientState(GL10.GL_VERTEX_ARRAY);
      gl.glDisableClientState(GL10.GL_TEXTURE_COORD_ARRAY);
   }

   // Load images into 6 GL textures
   public void loadTexture(GL10 gl) {
      gl.glGenTextures(6, textureIDs, 0); // Generate texture-ID array for 6 IDs

      // Generate OpenGL texture images
      for (int face = 0; face < numFaces; face++) {
         gl.glBindTexture(GL10.GL_TEXTURE_2D, textureIDs[face]);
         gl.glTexParameterf(GL10.GL_TEXTURE_2D, GL10.GL_TEXTURE_MIN_FILTER, GL10.GL_NEAREST);
         gl.glTexParameterf(GL10.GL_TEXTURE_2D, GL10.GL_TEXTURE_MAG_FILTER, GL10.GL_LINEAR);
         // Build Texture from loaded bitmap for the currently-bind texture ID
         GLUtils.texImage2D(GL10.GL_TEXTURE_2D, 0, bitmap[face], 0);
         bitmap[face].recycle();
      }
   }
}
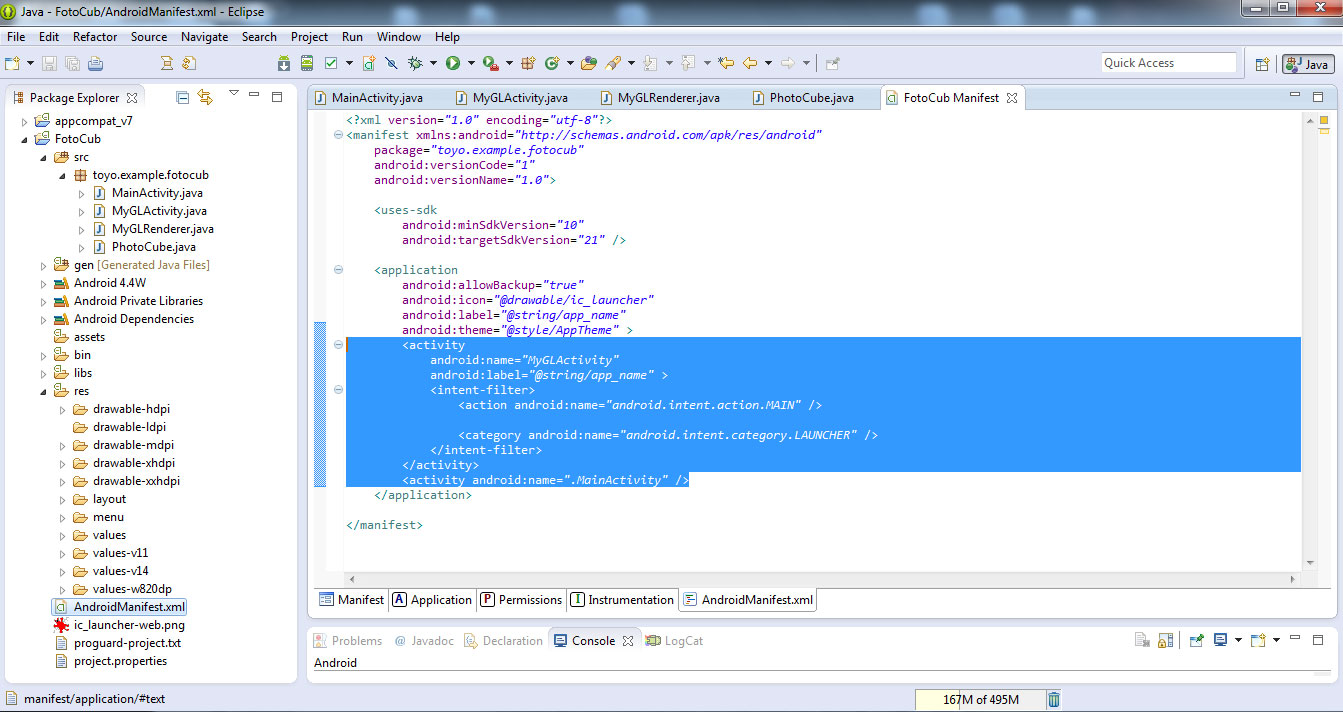
In fisierul AndroidManifest.xml al proiectului modificam codul:
        <activity
            android:name="MyGLActivity"
            android:label="@string/app_name" >
            <intent-filter>
                <action android:name="android.intent.action.MAIN" />

                <category android:name="android.intent.category.LAUNCHER" />
            </intent-filter>
        </activity>
        <activity android:name=".MainActivity" />
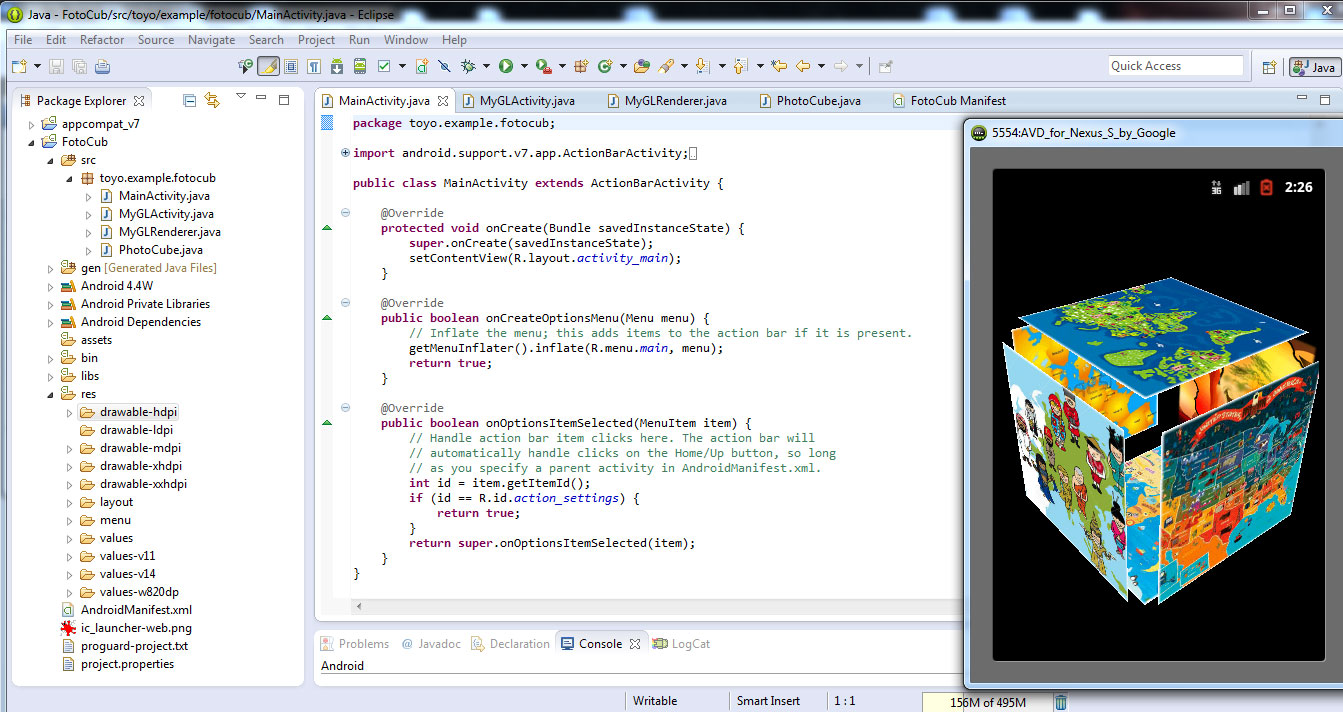
Rulam aplicatia si vedem rezultatul final: un cub 3D care se roteste si care are pe fiecare fata a sa, cate una din pozele pe care le-am inclus in proiect.
Vezi aici cum poti sa-ti salvezi aplicatia in vederea rularii ei pe telefonul mobil.
Proiectul (cu toate fisierele) realizat se poate downloada de AICI.
Aplicatia pentru telefonul mobil se poate downloada de AICI.
Dupa ce se downloadeaza, se copiaza in telefonul mobil si se instaleaza.
Vezi aici exemplu de aplicatie cu cub 3D cu 6 poze, animat.
Urmareste tutorialul video despre cum sa creezi un cub cu 6 fotografii care se roteste in Android: