Tutorial despre mutarea imaginilor, prin atingere si tragere oriunde pe suprafata ecranului telefonului.
Deschidem Eclipse si cream un proiect nou (vezi aici cum) pe care il denumim MutareImagini.
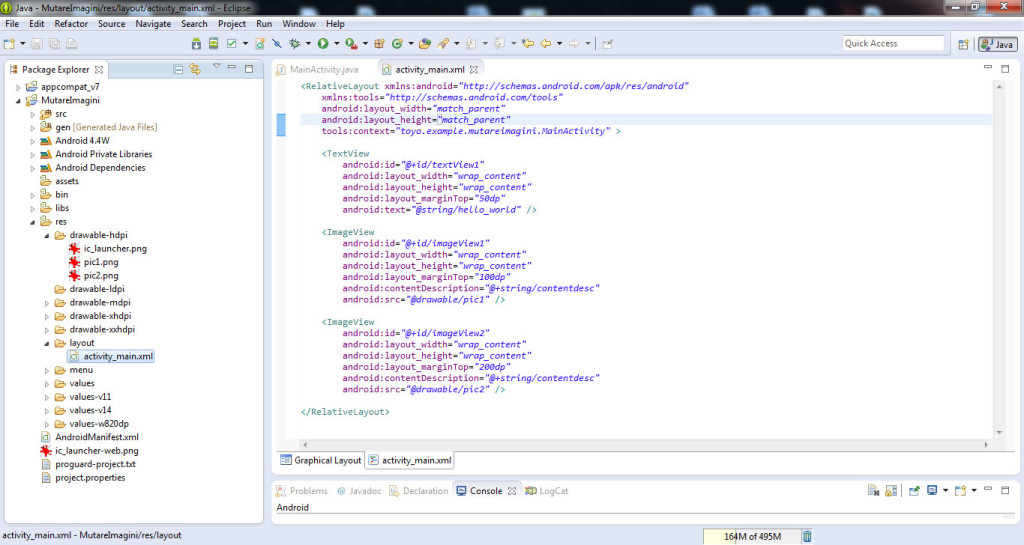
Punem doua imagini (pe care vrem sa le mutam pe ecran) din pc (cu copy-paste) in res -> drawable-hdpi (pic1.png, pic2.png).
In res -> layout -> activity_main.xml cream doua ImageView. Din panoul din stanga, deschidem Images & Media si tragem cu mouse-ul de ImageView de doua ori, in fereastra alba sau scriem codul:
    <ImageView
        android:id="@+id/imageView1"
        android:layout_width="wrap_content"
        android:layout_height="wrap_content"
        android:layout_marginTop="100dp"
        android:contentDescription="@+string/contentdesc"
        android:src="@drawable/pic1" />

    <ImageView
        android:id="@+id/imageView2"
        android:layout_width="wrap_content"
        android:layout_height="wrap_content"
        android:layout_marginTop="200dp"
        android:contentDescription="@+string/contentdesc"
        android:src="@drawable/pic2" />
Deschidem folderul res -> values -> strings.xml si adaugam urmatorul cod:
    <string name="hello_world">Muta imaginile pe ecran</string>
    <string name="contentdesc">descriere</string>
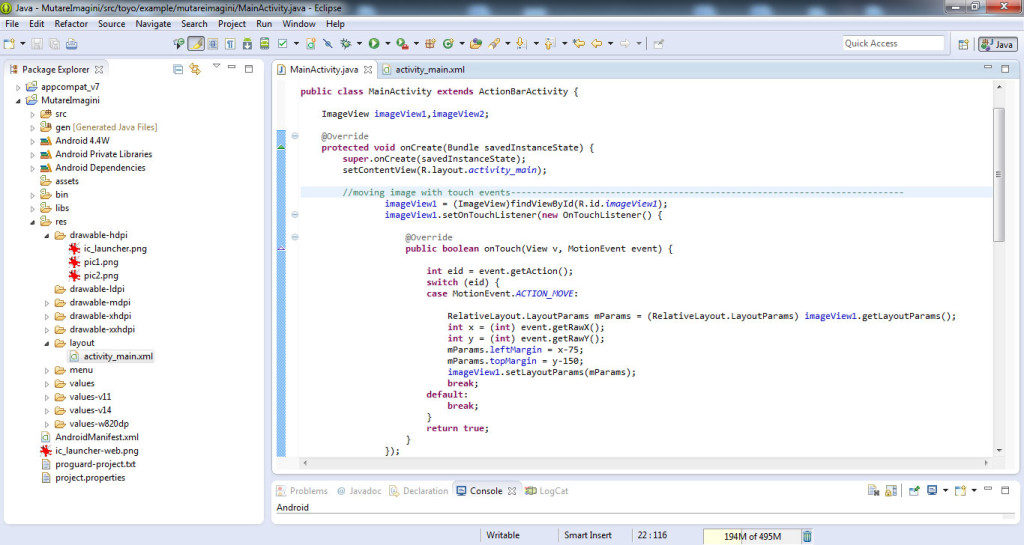
Deschidem MainActivity.java si scriem urmatorul cod:
public class MainActivity extends ActionBarActivity {

    ImageView imageView1,imageView2;

    @Override
    protected void onCreate(Bundle savedInstanceState) {
        super.onCreate(savedInstanceState);
        setContentView(R.layout.activity_main);

        //moving image with touch events---------------------------------------------------------------------------
                imageView1 = (ImageView)findViewById(R.id.imageView1);

                imageView1.setOnTouchListener(new OnTouchListener() {

                    @Override
                    public boolean onTouch(View v, MotionEvent event) {

                        int eid = event.getAction();
                        switch (eid) {
                        case MotionEvent.ACTION_MOVE:

                            RelativeLayout.LayoutParams mParams = (RelativeLayout.LayoutParams) imageView1.getLayoutParams();
                            int x = (int) event.getRawX();
                            int y = (int) event.getRawY();
                            mParams.leftMargin = x-75;
                            mParams.topMargin = y-150;
                            imageView1.setLayoutParams(mParams);
                            break;
                        default:
                            break;
                        }
                        return true;
                    }
                });
        //end moving image with touch events--------------------------------------------------------------------------------

        //moving image with touch events---------------------------------------------------------------------------
                imageView2 = (ImageView)findViewById(R.id.imageView2);

                imageView2.setOnTouchListener(new OnTouchListener() {

                    @Override
                    public boolean onTouch(View v, MotionEvent event) {

                        int eid = event.getAction();
                        switch (eid) {
                        case MotionEvent.ACTION_MOVE:

                            RelativeLayout.LayoutParams mParams = (RelativeLayout.LayoutParams) imageView2.getLayoutParams();
                            int x = (int) event.getRawX();
                            int y = (int) event.getRawY();
                            mParams.leftMargin = x-75;
                            mParams.topMargin = y-150;
                            imageView2.setLayoutParams(mParams);
                            break;
                        default:
                            break;
                        }
                        return true;
                    }
                });
        //end moving image with touch events--------------------------------------------------------------------------------
    }
}
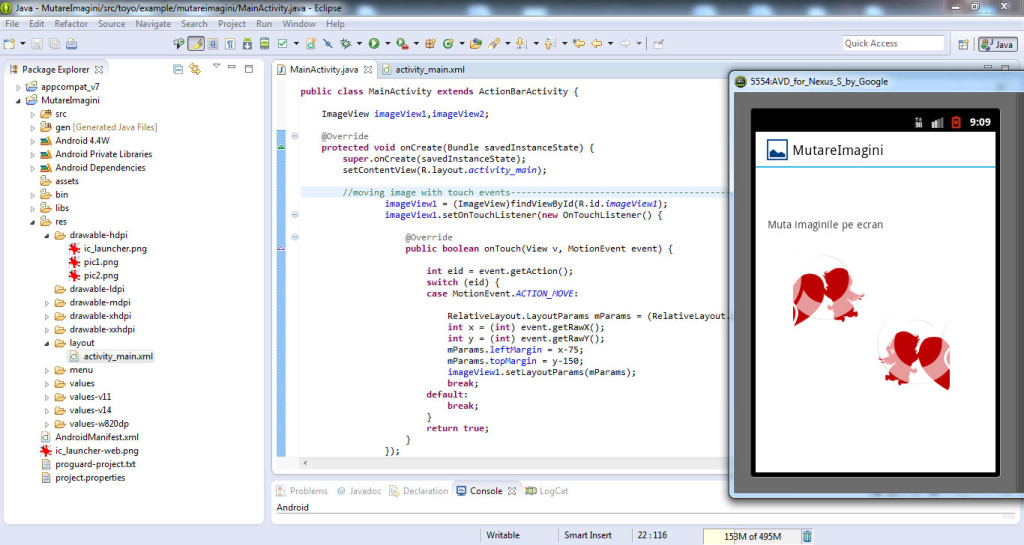
Rulam aplicatia si mutam cum vrem pozele pe ecran.
Vezi aici cum poti sa-ti salvezi aplicatia in vederea rularii ei pe telefonul mobil.
Proiectul (cu toate fisierele) realizat se poate downloada de AICI.
Aplicatia pentru telefonul mobil se poate downloada de AICI.
Dupa ce se downloadeaza, se copiaza in telefonul mobil si se instaleaza.
Urmareste tutorialul video despre cum sa muti imaginile de pe ecran in Android:


